After the final submission of the 3-week projects, my Final Major Project partner Litha (
https://www.artstation.com/lithabacchi ) and I sat down together and started planning and gathering reference for our project.
We had previously decided to recreate a concept she found on Artstation, Atlas Square by Eddie Mendoza.
Whilst Litha will be responsible for creating a modular kit, other assets, textures, etc. my first main task will be coming up with a procedural building generator in Houdini, which will probably be quite the challenge, since I have only used Houdini once before, during the Destruction VFX Brief.
1 - Houdini Building Generator
I am currently still in the testing phase and so far have only been working on one floor. Lots of the VEX code needs to be optimised, e.g. putting some code into functions, etc. In the following weeks I will expand the system to work with more different pieces.
1.1 - Building Footprint
After some fiddling around in Houdini I decided to use a Curve to let the user define the corner points of the building. To make sure, that the points of the curve really define corners and are not just in the middle of a straight line, I put the curve through an Attribute Wrangle to remove those points. Essentially I am checking the angle between the edges (defined by the vector between the points on each side of an edge) on each side of a point and remove the ones, where the angle is below a certain threshold.
 |
| Before - After |
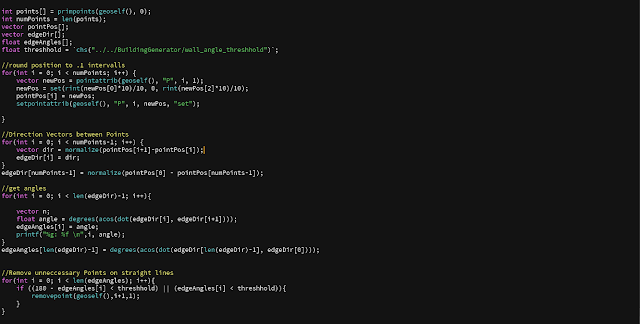 |
| Remove Points Vex |
1.2 - Placing corners
After having the optimised footprint I moved on to placing the corner pieces. Since I am using instances for all the pieces I assign an attribute to all the points, called "Instance". Currently I only have one degree simple 45 and 90 degree corner each, but later I will assign those to the points from an array containing all the paths to the geometry files. Right now I am just using the file path to these two files.
To place and rotate those pieces correctly. I use the direction vector of the edge leading up to a point and assigning this vector as the point normal. However, I use atan2 to check, whether the angle is positive or negative and depending on that rotate the normal.
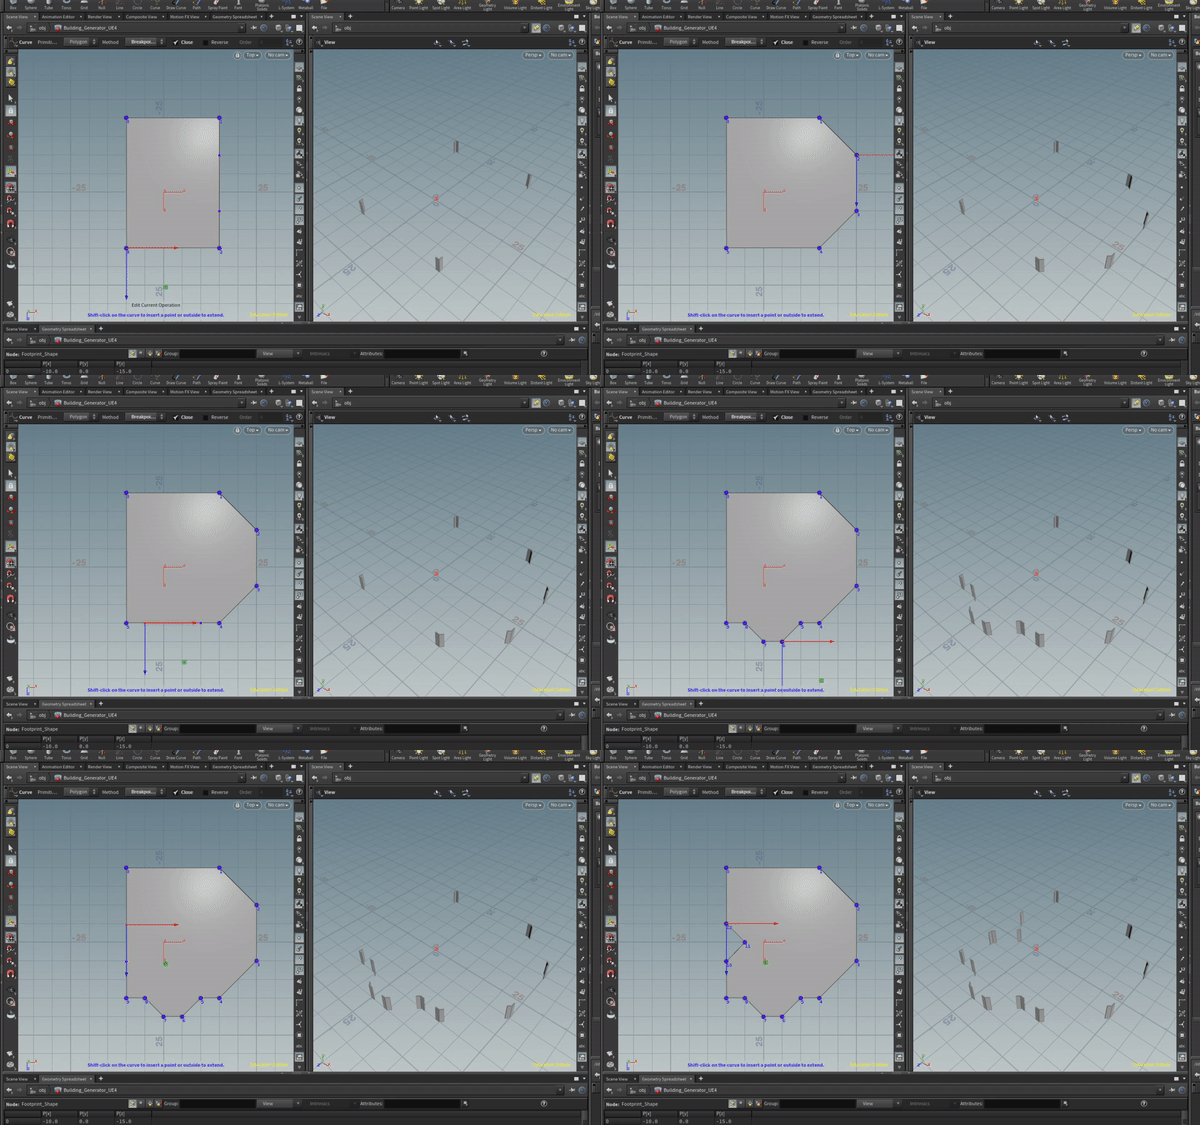 |
| Corner Piece Placement |
1.3 - Unique Pieces
Aside from the standard wall and corner pieces we also want the option to add unique pieces, for example storefronts, etc. so I added a multi parameter for those, so the user can add them.
Per piece you can currently chose the piece index ( they are still just basic boxes connected to a switch. Later they will work as instances. ), the building side to place it on, as well as the offset.
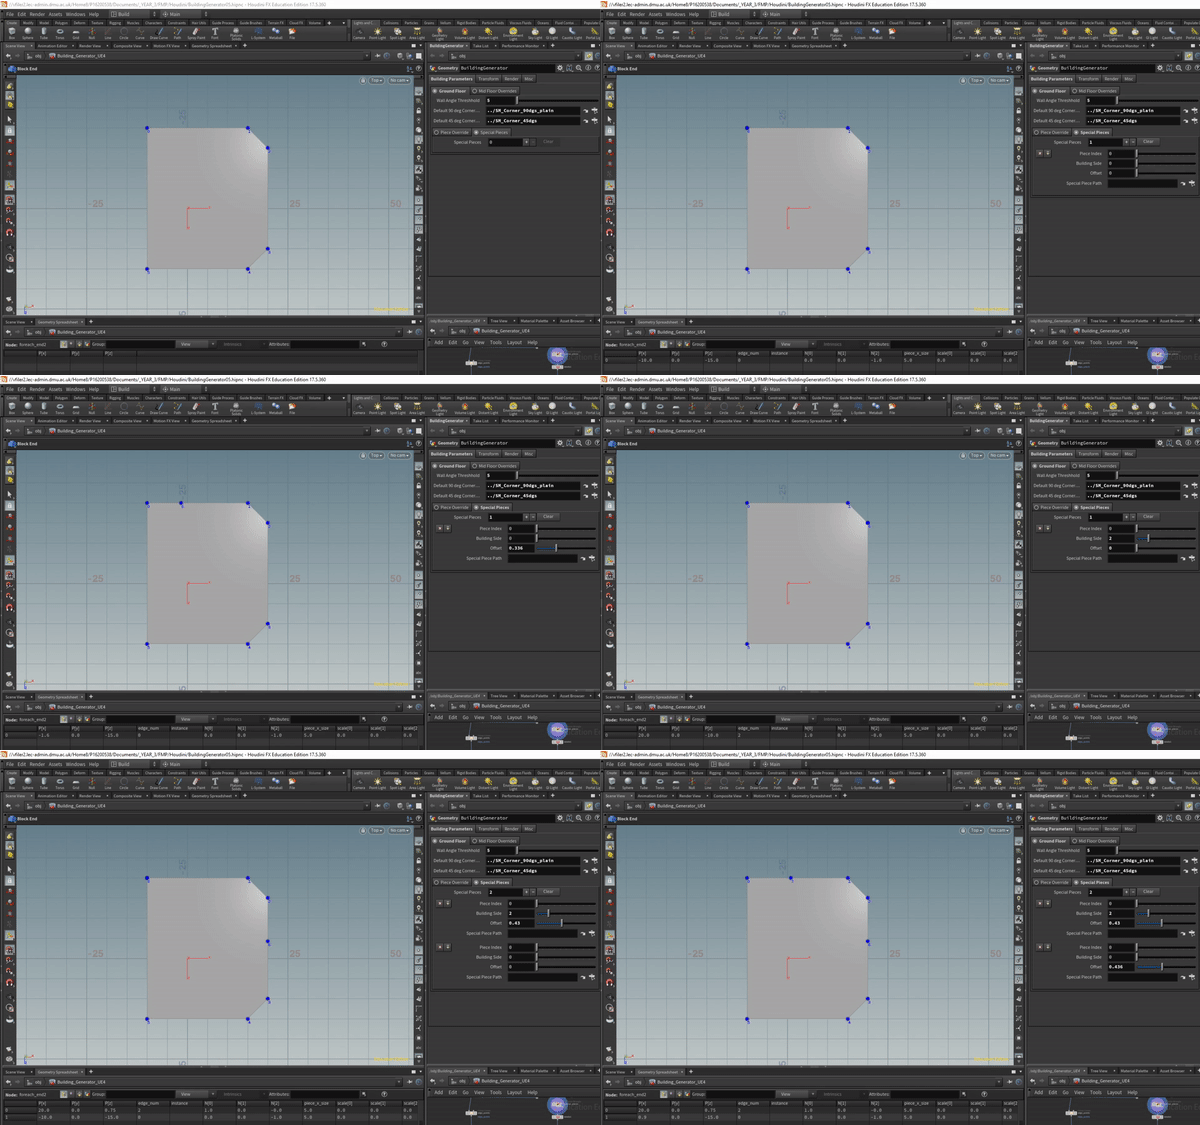 |
Unique Piece Placement
|
I place those pieces by getting the vector between the edge points, multiplying by offset and adding it to the start point of the edge. In the case of the unique as well as wall piece placement, I set the normal of those points to be perpendicular to the edge direction vector.
 |
| Unique Piece Placement VEX |
1.4 - Wall Placement
The wall placement proofed to be a bit tricky, since at this point the points, that make up the edges to place the walls on, are not in the right order anymore. Houdini still has them stored as 1,2,3,4....13... instead of 1,2,13,3,4..., if a unique piece (point number 13 ) has been added to an edge.
So I had to figure out how to sort the point indices into the correct order. Since I had already given the unique asset points an attribute storing the edge number, I could use this to do so. Essentially I could sort the points belonging to each edge, excluding the end point, since it is also the start point for the next edge and I do not want to store it twice, based on the distance to the start point. At the end of the "Sorted Indices" array I also added the start point index again, to make any further work easier, instead of having to add a special case for the last edge.
It took me some time to get it right and I definitely have to go back and add a few more comments to the code.
 |
| Sorted Indices |
Based on these sorted indices I can calculate building side lengths and how many walls I need to place on it. I also added a scale attribute to the points to rescale those wall pieces. I still need to make sure, that if the new scale is below a certain threshold, only plain walls and no window pieces get placed, otherwise we would get unrealistically scaled windows.
To calculate the edge length I also subtract the space taken by corner or unique pieces, using the bounding boxes to do so.
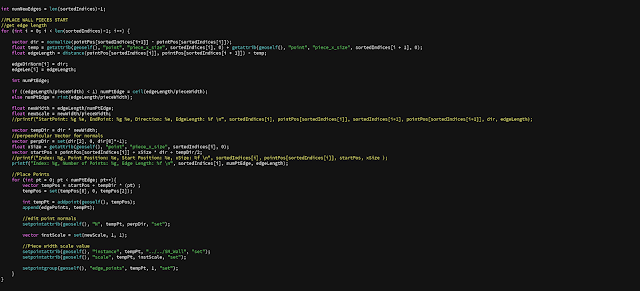 |
| Place wall pieces |
This is basically how far I got with the building generator in the 1 1/2 weeks since starting FMP. It involved a lot of research and figuring out how to approach certain problems.
Having sorted those I feel like it will be easier implementing the other planned features.
Here is how the tool looks in action right now:
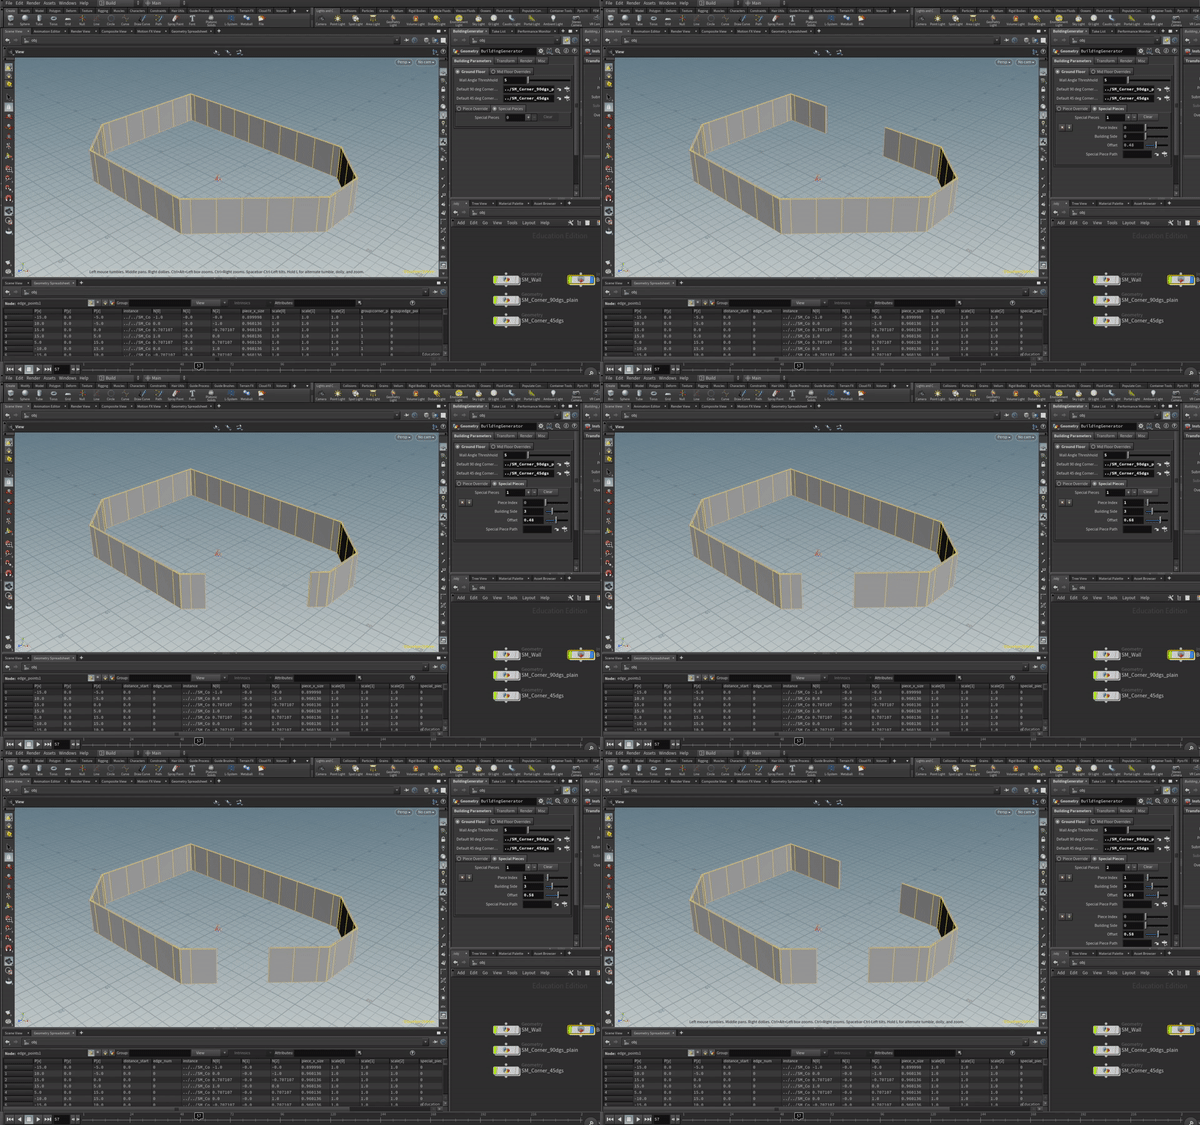 |
| Walls and unique assets |
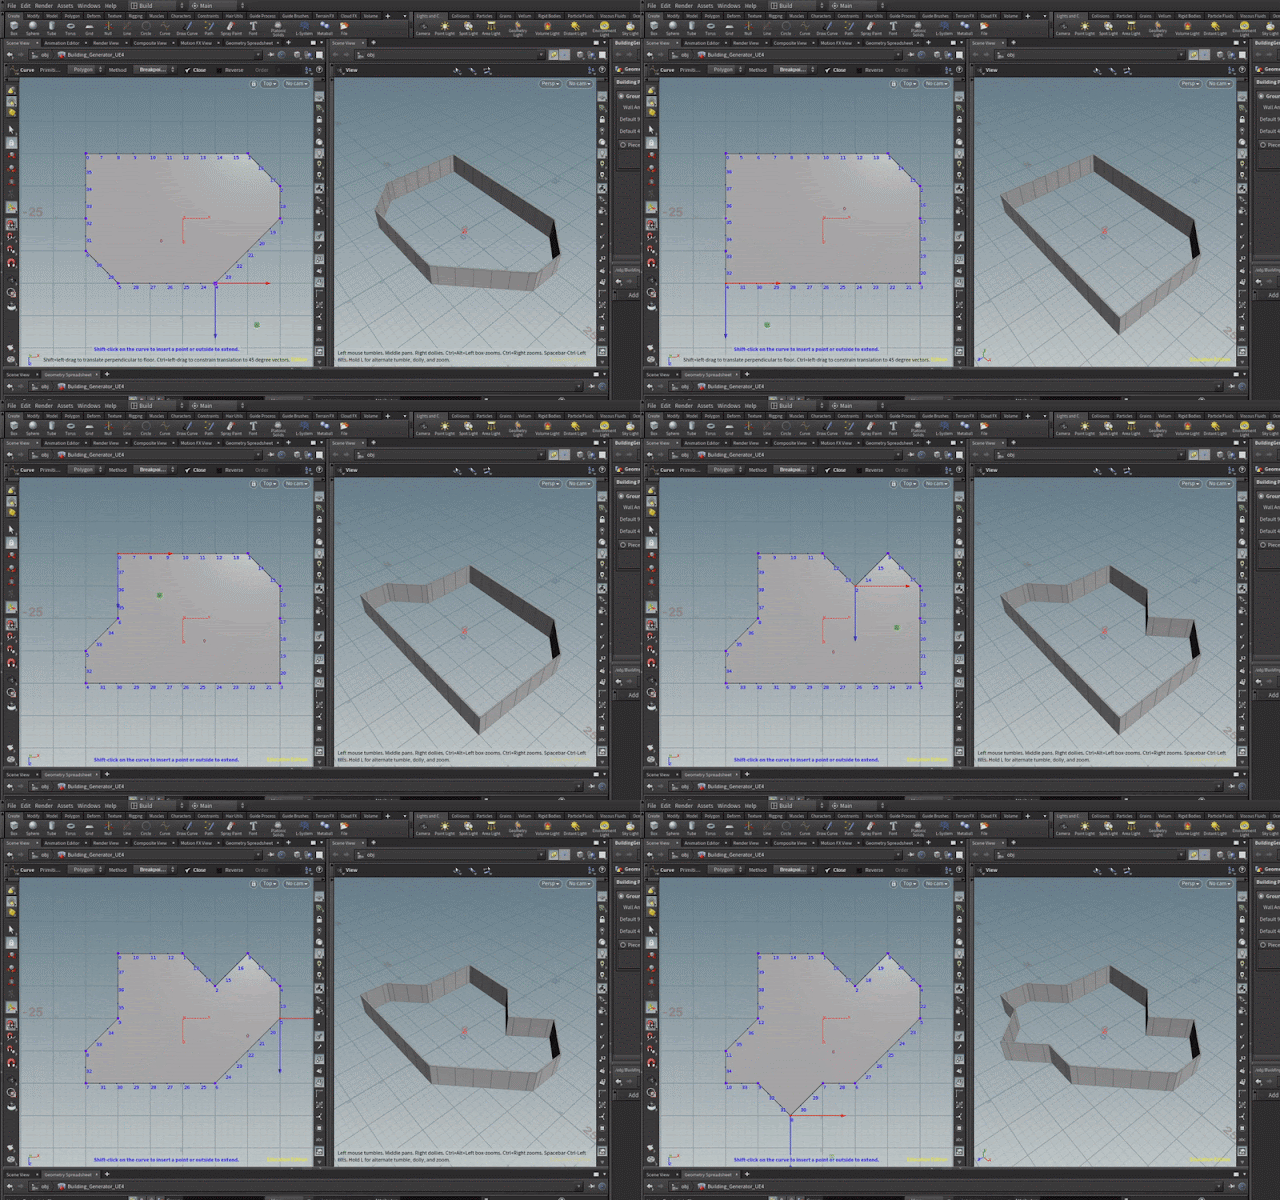 |
| Building Generator - Work in progress |
2 - Maxscripts
On the side I also have been working on multiple Maxscript tools for Litha to work with.
2.1 - Unwrap Tool
The first tool is for creating quick unwraps, flatten mapping the geometry. You can choose to either have the selected meshes share the UV Space or to unwrap them individually. The UV channel is also selectable.
2.2 - Position and Offset Tool
The next tool was for moving vertices, or vertices of selected faces or edges, to a specified location, or offsetting them. Litha suggested that one to me to help with the creation of the modular pieces. It also has the option to save the current vertex positions and reset back to them, since undoing Maxscript stuff sometimes doesn't work.
2.3 -Export Tool
This one is pretty self-explanatory. You can copy paste a file location and choose a unit for export. The tool checks, if the location is valid, or asks if you want to create the folder, if it does not exist yet. You can also choose to export meters and centimetres. I will expand this tool in the future.
